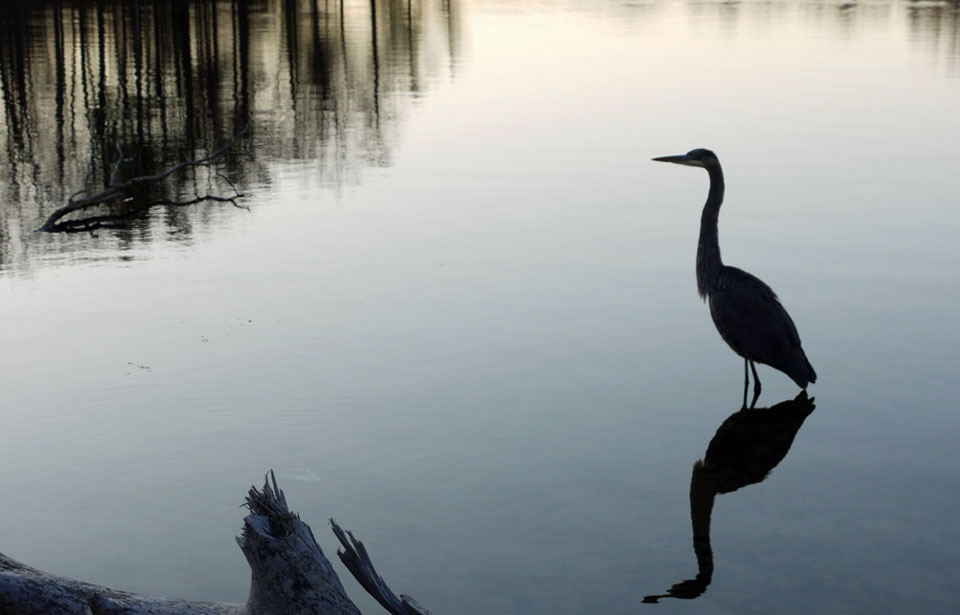
The great blue heron, one of our largest, most picturesque avian migrants, stands more than a metre tall. It breeds from March to May throughout southern Canada after trekking 3,000 to 4,000 kilometres from Texas, Florida, Mexico, or South America. Herons typically nest in treetop colonies of 20 to 40 birds on islands, peninsulas, shorelines, and beaver ponds. They abandon these sites as nesting trees rot and fall to the ground.
You can slow or halt a colony’s decline. Guard nests in living trees from beavers by wrapping sheet metal around the bases of trunks to prevent them from being felled. Replace collapsed trees with nesting platforms to greatly extend the life of a colony. The following nesting structure will accommodate not only great blue herons but also black-crowned night-herons and double-crested cormorants.
- Choose a site in an existing colony, with water no more than 1.5 m deep. Erect nesting structures from January to March, before herons return from their wintering grounds.
- Obtain new or used cedar utility poles (30’ long and 8 to 10” in diameter at the base) from your local hydro or telephone company.
- Construct three nesting platforms for each pole. Cut the materials, drill the bolt holes, and assemble the platforms before going to the project site.
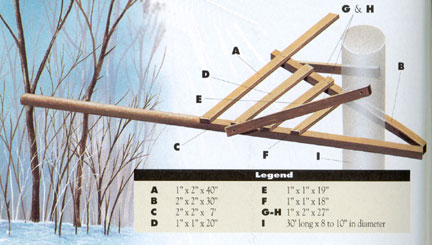
- Nail the outer nest support (A) to the short support brace (B) and the long support brace (C), with a 53-cm distance between nailing points. One end of the outer nest support (A) will extend beyond the short support brace (B) to serve as a perch. The long support brace (C) will extend beyond the outer nest support (A) to serve as another perch. Nail the inner nest supports (D, E, and F) to the support braces (B and C).
- Bolt one side arm (G) to the long support brace (C). Bolt the other side arm (H) to the short support brace (B).
- Finish the construction on the ice at the project site. (Ensure safety by getting assistance from parks staff, a local conservation group, or utility company.) Attach support braces (B and C) and side arms (G and H) to the pole (I) with lag bolts. Give each platform an upward tilt to create a nesting niche.
- Place the first platform at the top of the pole, the second 1.2 m below, and the third 1.2 m below the second. Project the second platform in the opposite direction to the first and third. Wire a few branches to the top of each platform.
- Use a chain saw to cut a hole, 60 cm in diameter, in the ice.
- Drill a hole 2 m deep in the earth with a 20-cm power auger. Set the pole firmly in the hole.
- Inspect the structure for damage at the end of each nesting season.

Materials (sold in imperial measures)
A 1” x 2” x 40” E 1” x 1” x 19”
B 2” x 2” x 30” F 1” x 1” x 18”
C 2” x 2” x 7’ G/H 1” x 2” x 27”
D 1” x 1” x 20” I 30’ long x 8 to 10” in diameter


